Convert a physical chessboard into a digital one
| Saurabh BIntro
We have quite a few chess enthusiasts at our Oslo office, so we thought it would be cool to make something interesting for ourselves: a chessboard scanner that converts the image of a physical chessboard at any given (chess) position into a digital chessboard! Then we could record the current state of the game and continue playing on our own devices, or share it with friends.
In this article I’ll go through the journey of building the chessboard scanner. Let’s start with understanding the problem we are trying to solve - we want to get a digital copy of a physical chessboard from an image.
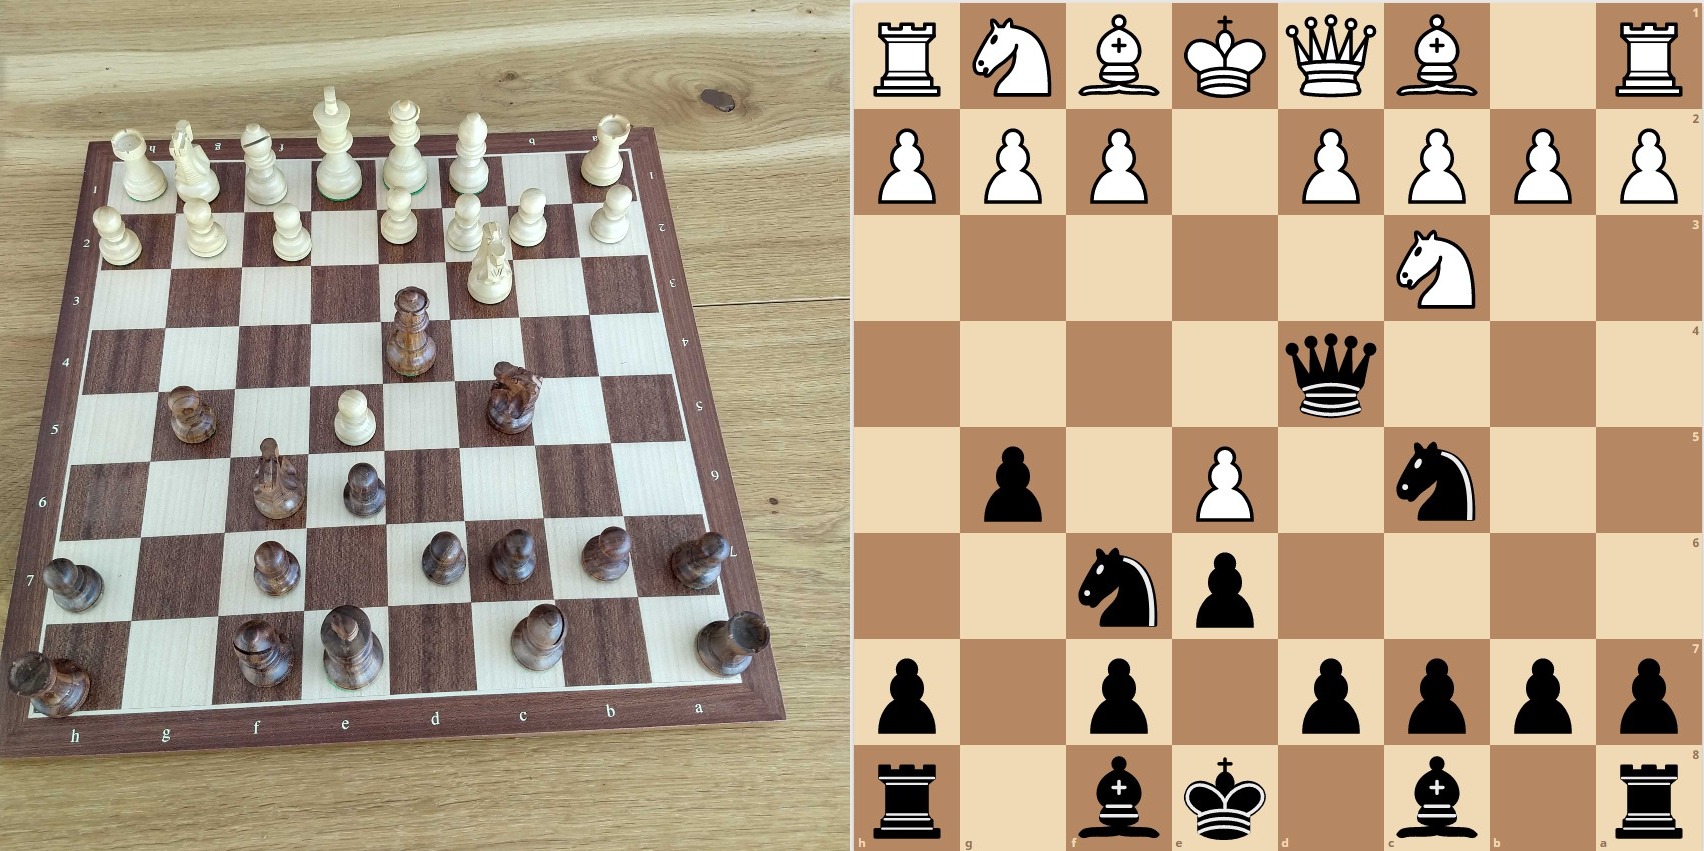 Expected input-output flow
We can break this problem down into three sections:
- Chessboard recognition from a given image
- Identifying the chessboard position, orientation, square color, etc
- Chess piece recognition
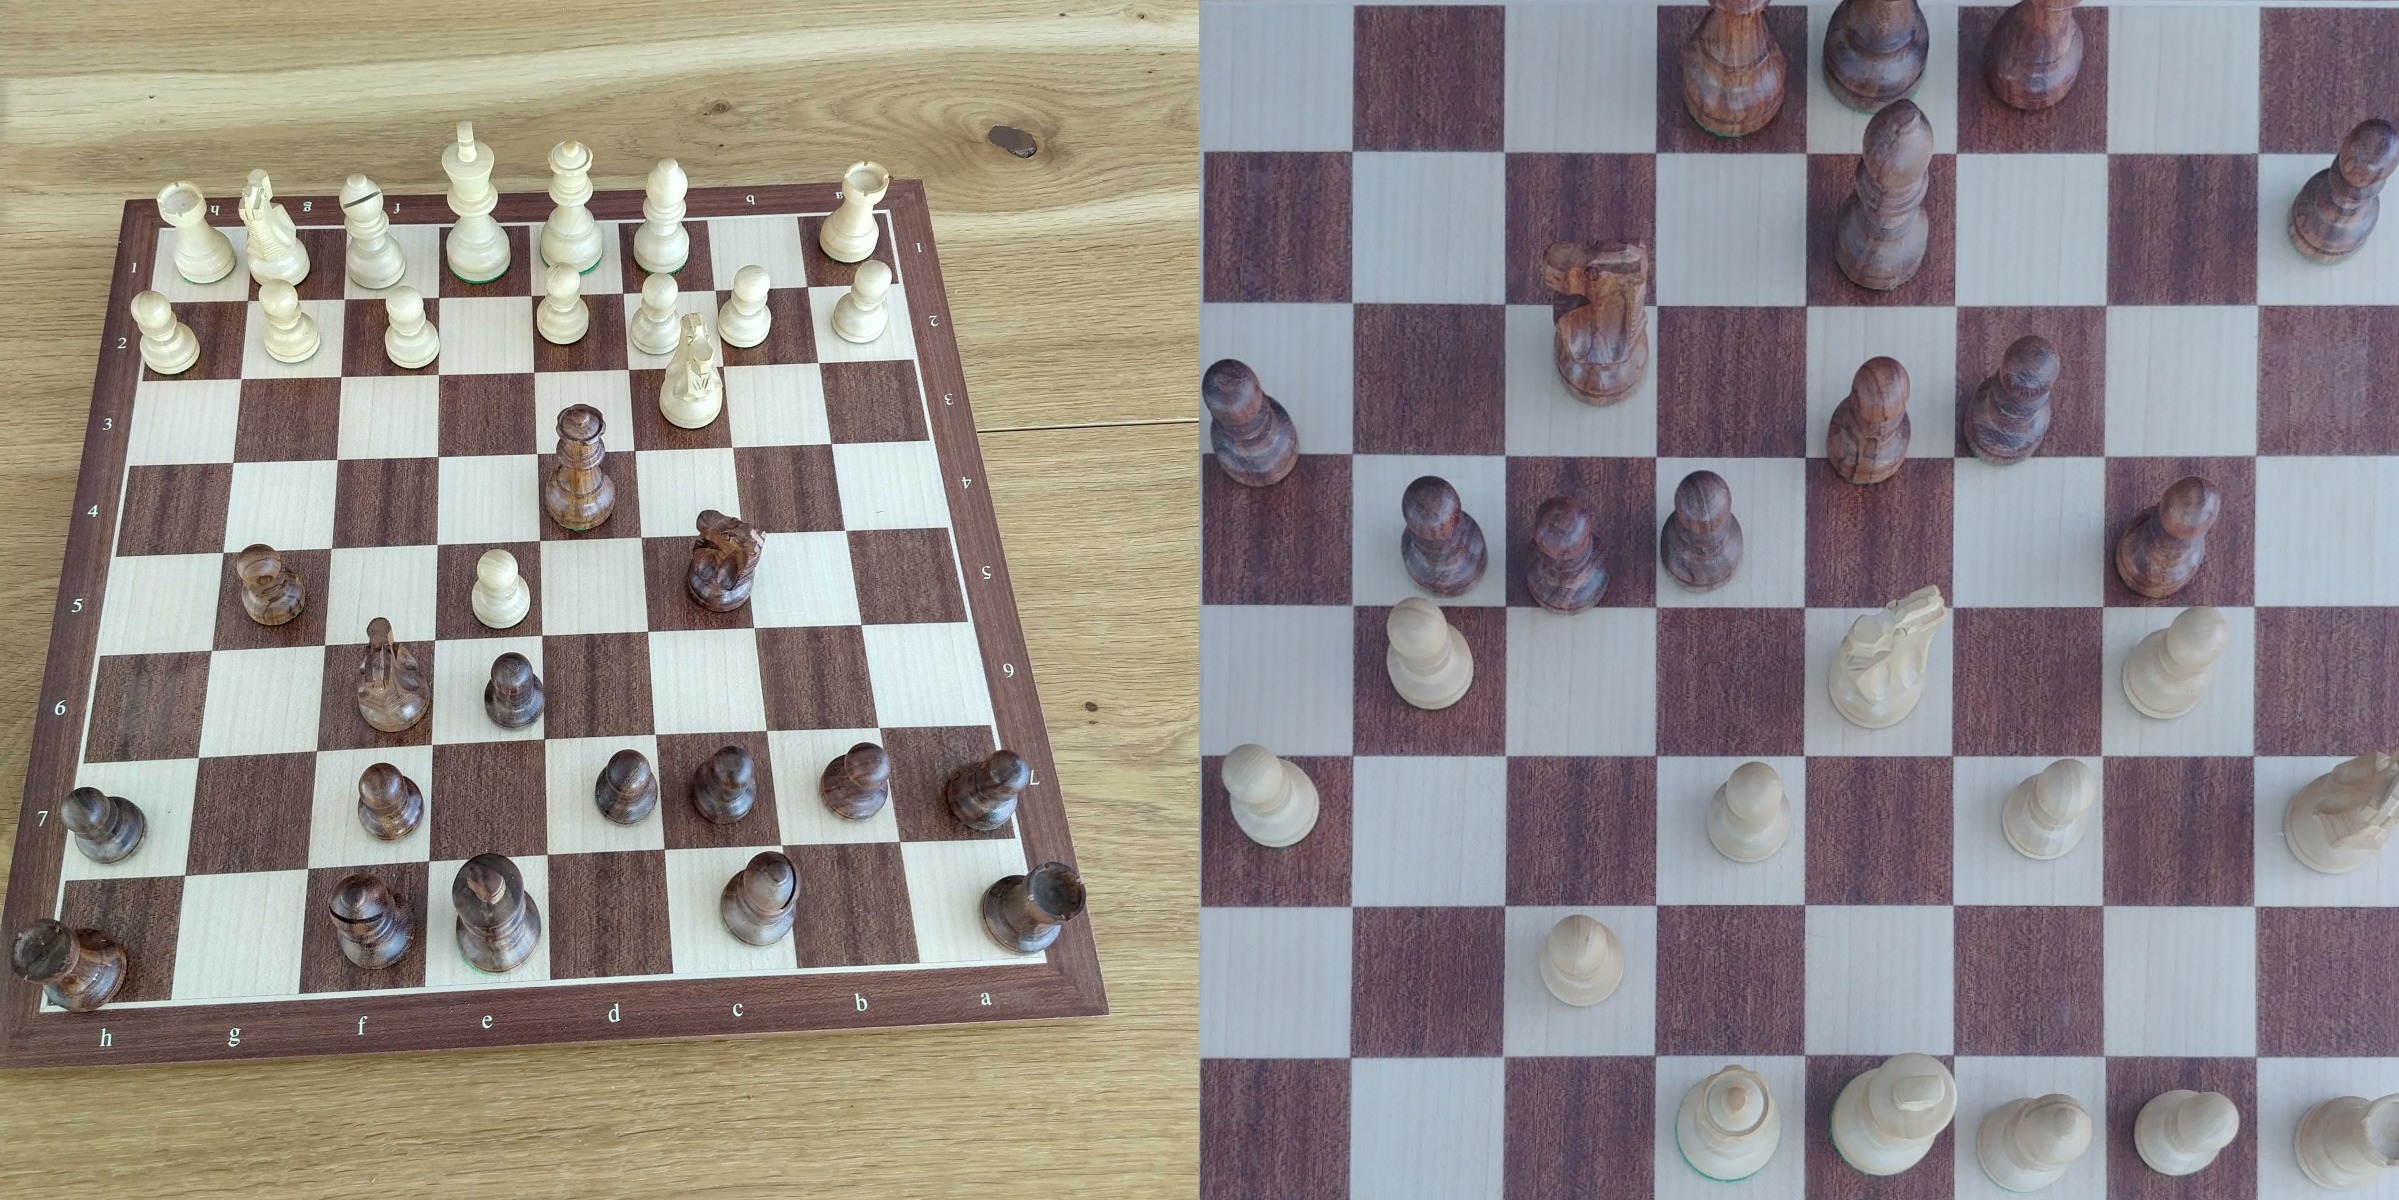
Chessboard recognition
Chessboard (and chess piece) recognition from a given image is an obvious candidate for computer vision. Though precise positioning of the chessboard using computer vision is quite challenging, there have been few attempts to solve this problem 1 2. The algorithm proposed by Maciej A. Czyzewskia et al. for chessboard recognition 1 stands out. Their solution is based on generating a heat map to calculate the probability of a chessboard being located in a subsection of the image and cropping a tetragonal sub-area with highest probability values. This step is iterated to get the final square image of the chessboard. Remarkably, this approach is not affected by poor lighting conditions, the type of the chessboard, the image capturing angle nor damage to the chessboard. According to a comparison in their paper, this solution outperforms others. They have also benevolently published their code. With a few tweaks of our own we tested the algorithm and found it to be working really well.
 Chessboard
recognition
Chessboard
recognition
Employing the heat map approach, we can now easily crop a 2d projection of a chessboard into 64 individual squares. The next step is thus detecting whether a square is dark or light.
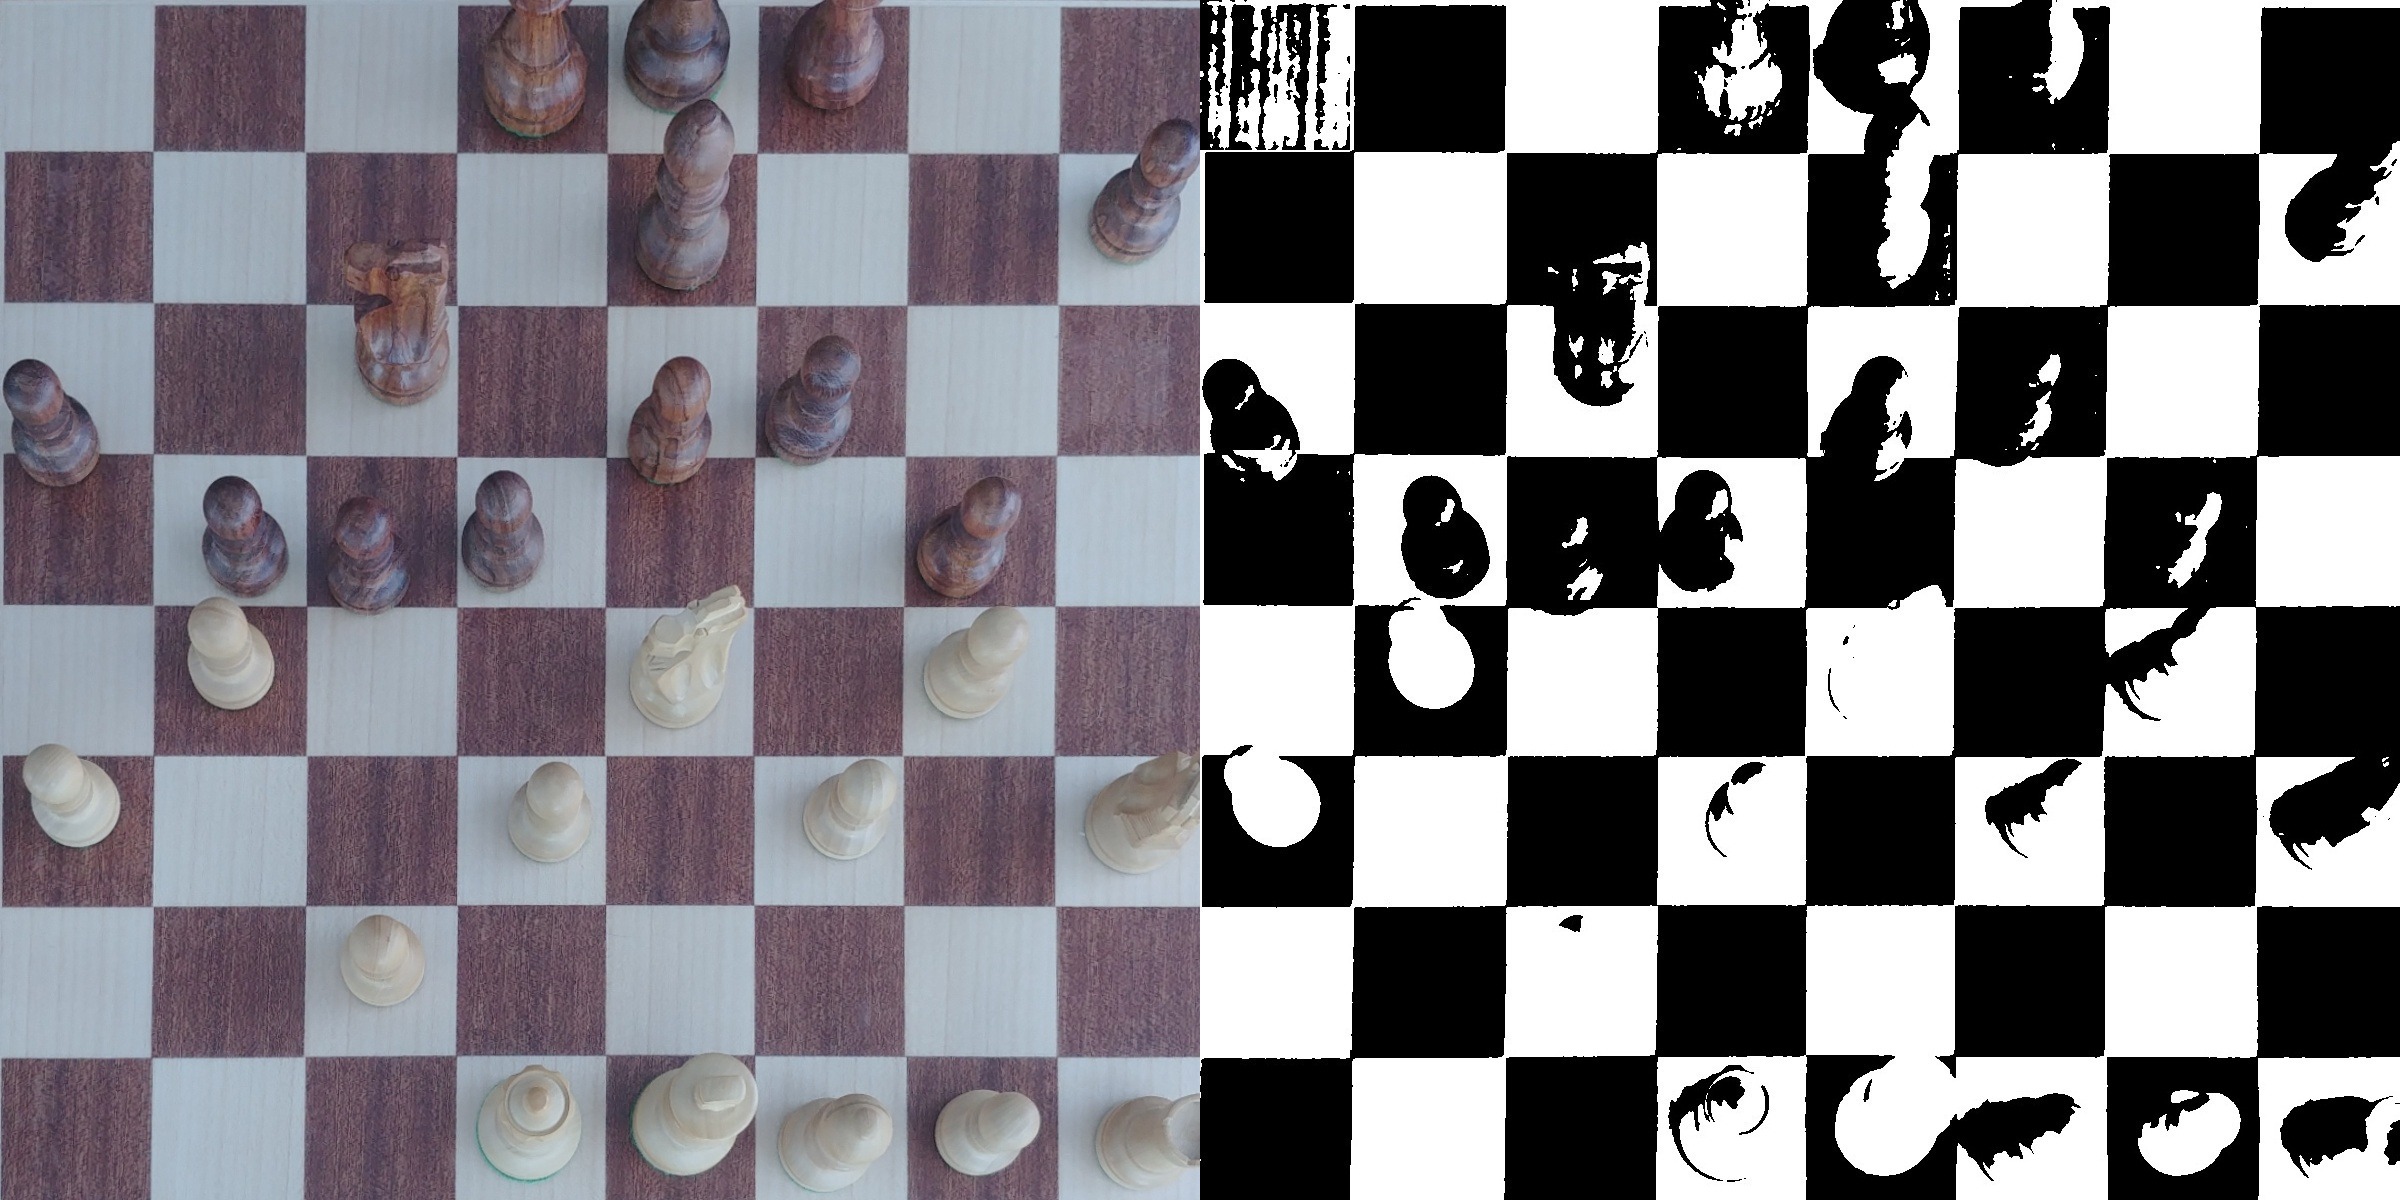
Square color recognition
Luckily for us, the color pattern of a typical chessboard is very straightforward. If we can determine just a single square with reasonable accuracy, then we can assign colors to the rest of the squares. With only two possible colors on a chessboard, binarizing the square should tell us if a square is light or dark.
Since we can’t have complete control over the brightness and other conditions, the extracted square image can be noisy, and simple image thresholding therefore won’t always provide clear results. To remove the noise Otsu's Binarization can be used as follows:
import cv2 as cv
img = cv2.imread("noisy_square_img.png",0)
blur = cv2.GaussianBlur(img,(5,5),0)
_, img_binary = cv2.threshold(blur,0,255,cv2.THRESH_BINARY+cv2.THRESH_OTSU)
This way we can calculate the exact amount of dark and light portions on a
square. Given that there can be maximum of 32 pieces on a chessboard, we will
always have at least 32 empty squares which can be used to determine the
reference square color. We will also set the acceptance threshold to 95 % to
make sure that even in poor lighting conditions, all the square colors are
detectable with high accuracy.
 Output from Otsu's
binarization
Output from Otsu's
binarization
Chess piece recognition
Here comes the fun part! We’ll use the magic of computer vision to recognize chess pieces on a square. Even though computer vision is around 60 years old, the last decade has seen tons of new research and development within the field. Often you’ll find use of Convolutional Neural Network (CNN) in computer vision algorithms. We'll be re-training an existing CNN for piece recognition.
Training a CNN usually requires a sizeable amount of data, and unfortunately there is no dataset available that we can use 😔. This means we’ll have to build our own dataset!
1. Building a dataset
To make sure that our CNN works well on all sorts of chessboards we need some diversity in the dataset. This means we’ll need images with different angles, brightness, positions, etc. on different types of chessboards. For each image we get a 2D projection of a chessboard in the image using the chessboard recognition algorithm explained above. Next we crop the 2D projection into 64 individual squares, thus extracting 64 data points from a single image.
While taking pictures of different chessboards we realized that annotating all these images manually will be laborious and time consuming. Luckily we thought of an elegant solution to label all the images without any manual intervention: In the classical format of chess, players are asked to record the game with algebraic notation. We can re-play these recorded games and take a picture after each move. While splitting the 2D projected chessboard into 64 images, each image needs to be saved with an index from 0 to 63. Each index corresponds to the position of the square on the chessboard. Using python-chess we walk through the recorded game and label images as follows:
import os, glob
import chess.pgn

# read the game file and set board
pgn = open("game.pgn")
game = chess.pgn.read_game(pgn)
board = game.board()

# read chessboard image at move x, jump board to move x
filename = "move_x.jpg"
move = game.mainline_moves()
board.push(move)

for i in range(64):
    piece = board.piece_at(i)
    if piece is None:
        # save image with empty label
    else:
        # save image with piece.symbol() label
With this simple script we managed to label 123,008 images in a matter of minutes. I personally feel this part was the highlight of the project. 🎊
2. Training the CNN
Now it’s time to train our image classifier. There are quite a few options these days to do out-of-the-box machine learning. Personally I like Keras to quickly build and test something.
At any moment during a game, at least 50 % of the chessboard is empty squares which means that a minimum of 50% of the images in our dataset are squares without a piece. Since training requires a lot of data, we need to artificially extend the size of the training dataset. This can be easily done using the ImageDataGenerator class as follows:
import os
from keras.preprocessing.image import ImageDataGenerator
from keras.applications.inception_resnet_v2 import preprocess_input

original_dataset_dir = <labeled_dataset>

base_dir = <base_dir>
os.mkdir(base_dir)

# Directories for our training, validation and test splits
train_dir = os.path.join(base_dir, 'train')
os.mkdir(train_dir)

validation_dir = os.path.join(base_dir, 'validation')
os.mkdir(validation_dir)

test_dir = os.path.join(base_dir, 'test')
os.mkdir(test_dir)

train_datagen = ImageDataGenerator(
      preprocess_input=preprocess_input,
      rotation_range=40,
      shear_range=0.2,
      zoom_range=0.2,
      vertical_flip=True,
      horizontal_flip=True)

# the validation data should not be augmented!
test_datagen = ImageDataGenerator(preprocess_input=preprocess_input)
Given the relatively small dataset we decided to use transfer learning, it’s
better to re-train a few layers of a pre-trained model instead of training any
model from scratch. Keras offers quite a few pre-trained models to choose from.
We chose
Inception-ResNet-v2
as our base model, freezing the first 249 layers and re-training the remaining
ones with our dataset. We did experiment with VGG and others 3 as our base
model but Inception-ResNet-v2 performed significantly better than the rest.
import keras
from keras import layers
from keras import models
from keras.optimizers import Adam
from keras.applications.inception_resnet_v2 import InceptionResNetV2

base_model = InceptionResNetV2(include_top=False, weights='imagenet', input_shape=(150, 150, 3))
x = base_model.output
x = layers.GlobalAveragePooling2D()(x)
x = layers.Dense(1024, activation='relu')(x)
predictions = layers.Dense(6, activation='softmax')(x) # New softmax layer
model = models.Model(inputs=base_model.input, outputs=predictions)

# we chose to train the top 2 inception blocks
# we will freeze the first 249 layers and unfreeze the rest
for layer in model.layers[:249]:
   layer.trainable = False
for layer in model.layers[249:]:
   layer.trainable = True

adam = Adam(lr=0.0001)
model.compile(adam, loss='categorical_crossentropy', metrics=['accuracy'])
Now we just need to train our model using fit_generator on augmented training
data train_generator. We have divided the chess pieces into six different
groups: bishop, empty, king_or_queen, knight, pawn, rook. The group
king_or_queen consists of queen and king since it often can be difficult
even for human eyes to distinguish queen from king in an image
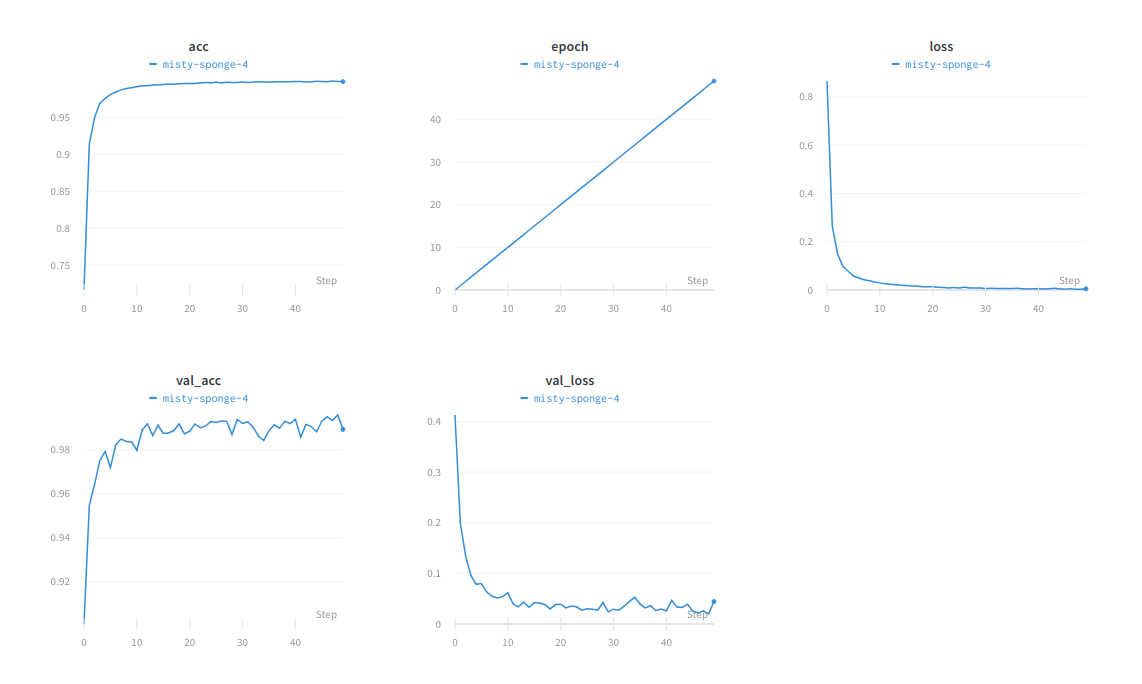 Overview of the training
run
Overview of the training
run
Determining chess piece color
For detecting the color of a single piece we can again make use of image processing, similar to what we did for square color. However, simple binarization of the image won’t really work here, since there can be lot of noise on an image of a square with a piece on it. To tackle this we make use of Morphological transformation as follows:
import cv2 as cv
img = cv2.imread("noisy_piece_img.png",0)
blur = cv2.GaussianBlur(img,(5,5),0)
_, img_binary = cv2.threshold(blur,130,255,cv2.THRESH_BINARY)
img_binary_inverted = cv2.bitwise_not(img_binary)
# remove noise
morph_kernel = np.ones((15,15),np.unit8)
output = cv2.morphologyEX(img_binary_inverted, cv2.MORPH_CLOSE, morph_kernel)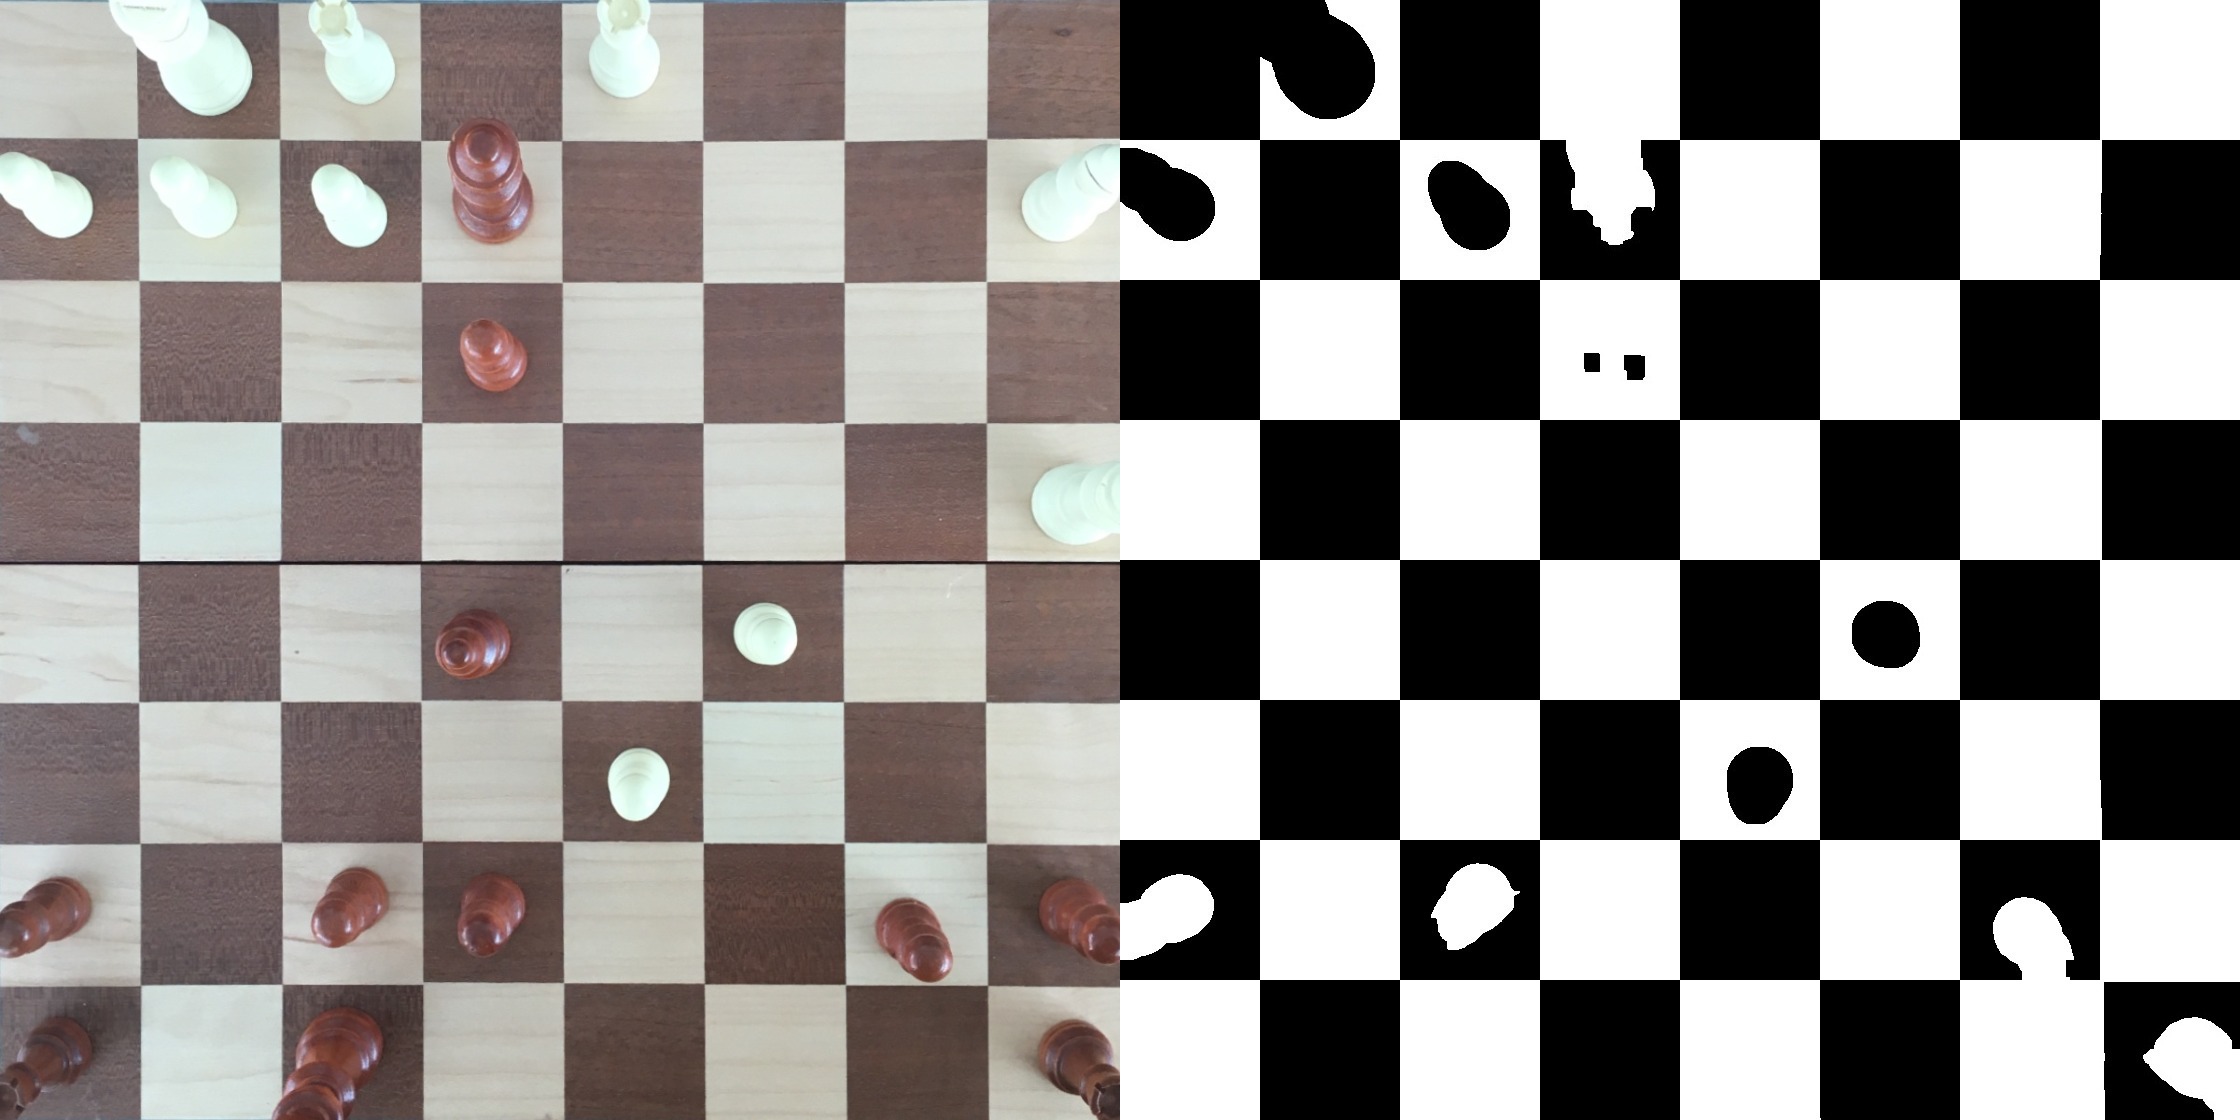 Morphological
transformation
Morphological
transformation
As we already know the color of the background square and whether it is occupied or empty, we can easily find the color of the piece.
Creating a digital board
Now that we have all the information it’s time to glue everything together to
create our digital chessboard copy. Earlier we combined
king and queen in a single group which means there can be maximum of four
possible outputs. We find the most likely output by combining chess rules, a
chess engine and the probabilities we got from the model. Here's a list of rules
we used:
- There can not be more than 32 pieces on a chessboard
- There can be a maximum of 16 pieces for a color
- At all times we need one king of each color on the board
- For each color, the total number of pawns and queen can not exceed nine
- For each color, the total number of pawns and piece except queen or king can not exceed ten
- You can not have pawns in the back rank (first and last row on a chessboard)
For mostly likely output, we generate the FEN which will be later used to create the digital board, all we are missing now is UI to visualize the output.
However when we looked into existing 3rd party/open source chessboard editors
for Android, we found that they were either outdated, too complicated or both.
Our talented mobile team used this opportunity to build a new component that can
read and parse the FEN representation of a board and allows users to freely
place/move pieces on a chess board using drag and drop. It’s also equipped to
return the edited board in FEN representation. Our
new lightweight library is
Kotlin based and is meant to work on the latest Android version (with backwards
compatibility to Android 5.0).
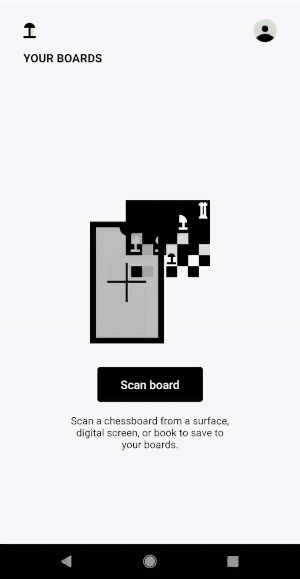
We have also been working on an Android app for the project and here's a glimpse of the MVP:
Conclusion
It's worth mentioning that we deployed everything to a GPU workstation equipped with Nvidia GeForce GTX 1080 Ti. With this setup, it takes about 10 seconds to process an image in order to get a digital copy of the chessboard. Looking back, lot of challenges we tackled during this project involved quite a bit of research and experimentation, like creating our own dataset, building a chessboard editor and successfully creating a digital copy of a chessboard from an image, with fairly good accuracy. With more data and research/experiments on model architecture we should be able improve performance of the piece recognition even further.
This is just the beginning of ChessVision and we are really excited about expanding its scope to wider use cases such as scanning a chessboard from a book, converting the video recording of a chess game to a digital copy (which can be exported to chess engines) and more.
References
-
Maciej A. Czyzewskia, Artur Laskowski, Szymon Wasik: Chessboard and chess piece recognition with the support of neural networks. 2018. ↩ ↩ 2
-
Zoltán Orémuš: Chess Position Recognition from a Photo. 2018. ↩
-
Karen Simonyan, Andrew Zisserman: Very Deep Convolutional Networks for Large-Scale Image Recognition. 2015. ↩